Create a basic diagram
This article uses the Basic Diagram template to explain
what you need to get started quickly - the basics of how to open a template, put
shapes in the drawing, and connect those shapes.
You can find much more information about how to use the
shapes themselves in the article
Shape basics. For
information about using other kinds of Edraw diagram libraries, see the article
How can I tell what each
Edraw library is for?.
- Open Edraw. When Edraw opens, all you need to work
with is the one titled Template Categories. (Tips: If you already have Edraw open,
on the Edraw Main Button, point to New, and then click
Choose Drawing Types....)
- In the Template Categories list, click the Basic
Diagram category. All of the libraries in the Basic Diagram
category appear in the central window.

- Double-click the template titled
Highlight Shapes.
- When the Highlight Shapes library opens,
most of the space is taken up with a blank drawing page. Because it is
important to line up the shapes when you create a diagram, the page appears
with grid lines on it.
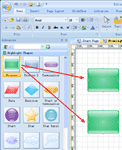
- Click any shape on the Highlight Shapes
template, hold down the mouse button, and drag the shape onto your drawing
page.

- When you release the mouse button, the shape is
bounded by a dashed green line that has green squares
 , called
selection handles, and sometimes yellow diamonds, called control handles
 . To learn
how to use control handles, selection handles, and other important shape
features, see the article
Shape basics.
- Repeat step 5 and 6 to add another shape to the
page.
- Connect the shapes together by using the
Connector.
You can also learn how to use Edraw by using the
training courses and demos that are available on the
Edraw
Online Web site.
